Error 0x0000007e when connecting a network printer occurs quite often both in Windows 10 and Windows 7. In most cases this error occurs in configurations when the printer is directly connected to another Windows computer (print server) and shared for printing from other computers over the network.
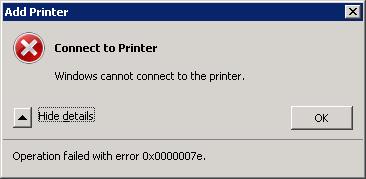
In my case, the error appeared in the following configuration. There is a print server on the 32-bit version of Windows Server 2008 x86 with several shared HP (Hewlett-Packard) printers. If you try to connect any printer from this server to a computer with 64-bit clients (Windows 10 or Windows 7), the operating system successfully downloads the correct version of the HP printer driver from the print server, but fails to install it with the error 0x0000007e.
Operation failed with error 0x0000007e.
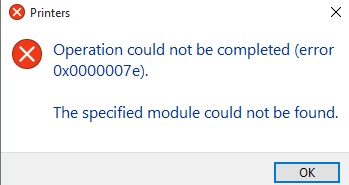
On Windows 10 computers, the printer connection error looks a little different:
The specified module could not be found.
However, there are no problems with connecting and installing shared network printers from the same print server from 32-bit Windows editions.
Error 0x0000007e appears only on 64-bit clients when trying to connect to a shared Hewlett Packard printer installed on a 32-bit print server (running on Windows Server 2003 x86 or Windows Server 2008 x86). Typically, the problem appears not with all HP printers, but only with those which are using the universal printer driver HP PCL (HP Universal Print driver).
What do you need to do to fix the error? First of all, you have to check that both a 32- and a 64-bit driver versions are installed on the print server. As you can see, x64 and x86 versions of HP Universal Printing PCL 6 driver are installed.
Having looked through HP and Technet forums, I found information that in the Universal HP Printing driver settings specified a fixed path to a spooler file (print queue) for a 32-bit system (spool\drivers\w32x86\3), which the 64-bit client unable to find, so error 0x0000007e appears. The file path is specified in the printer driver settings on the print server. In my case, it has been spool\DRIVERS\W32X86\3\hpcpn112.dll, but a dll file name depends on the Universal HP Printing driver version. Thus, the 32-bit version of the HP Universal Printing printer driver is incompatible with x64 versions of Windows. However, this can be fixed manually.
To fix this problem, you need to delete the corrupted (incorrect) registry key of the HP print driver on a print server (computer) to which the shared printer is directly connected. To solve this problem on a 32-bit print server:
- Open the Registry Editor (regedit.exe).
- Go to the registry key HKEY_LOCAL_MACHINE\SOFTWARE\Microsoft\Windows NT\CurrentVersion\Print\Printers\ and expand the branch with the printer name (In our case, it is HP Color LaserJet 5550 PCL 6).
- In the registry key of the printer which is facing with the problem, delete BIDI key in CopyFiles section. Note. In a productive environment, it is recommended to previously export the registry key to be deleted to a separate reg file. Then you’ll be able to roll back to the original settings.
- Restart the print spooler service on the client:
net stop spooler
net start spooler
- After removing the BIDI registry key on the server side, try to connect the shared HP printer again from your Windows 10 x64 client. It should be installed successfully without any errors
If this method doesn’t work, or if you receive a 0x0000007e error when connecting non-HP printers, you can try to connect the printer through the local port as a workaround. Here’s how to do it:
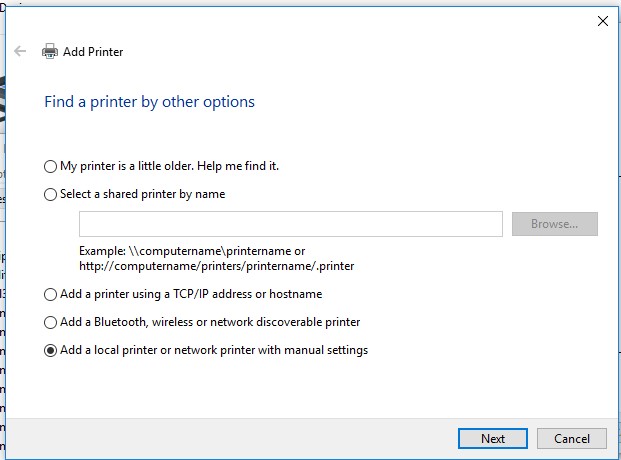
- From the Control Panel, add a new (local!!!) printer on your computer (Add a local printer or network printer manual settings).
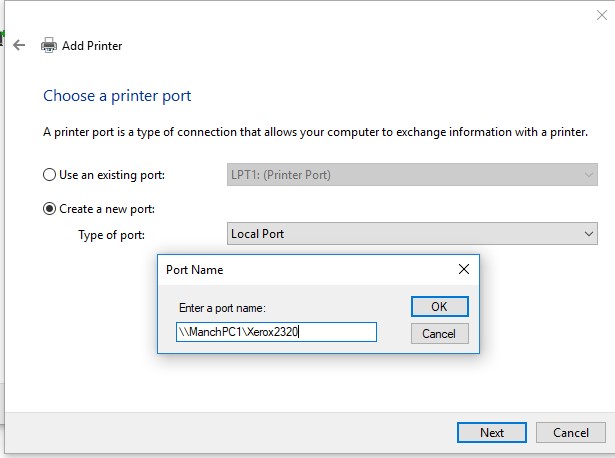
- Select that you want to create a new local port (Port Local type).
- As a port name you need to specify the full UNC path to the shared printer. For example, if ManchPC1 is the name of the computer to which the printer is connected and the shared printer named Xerox2320, then the UNC address of this printer will look like this:
\\ManchPC1\Xerox2320, or you can specify the computer’s IP address instead of the name\\192.168.1.55\Xerox2320. - After that, it remains to select (or install a new) a suitable printer driver.
There is another similar method of connecting such a network printer with the help of LPT port mapping.
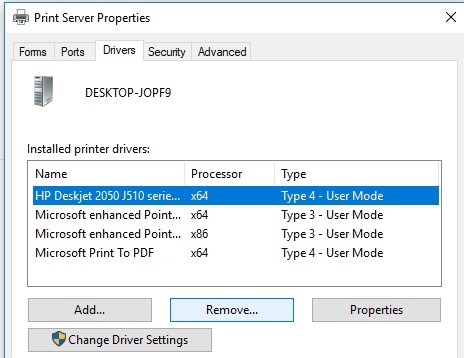
- Remove the printer driver for the connected printer from the driver repository. Select Print Server Properties -> Drivers tab -> select the driver (both 32 and 64 bit) and click the Remove.
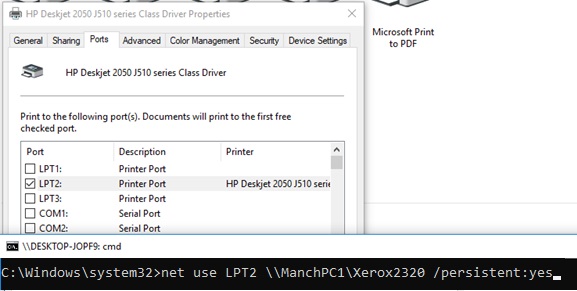
- Create a local printer with a connection through the new local LPT2.
- Then use the following command to create a permanent mapping of this virtual LPT port to the UNC address of the shared printer:
net use LPT2 \\ManchPC1\Xerox2320 /persistent:yes - It remains to install the printer driver and try to print a test document.


6 comments
Great article – solved my problem. THX 🙂
Brilliant! How rare that someone actually understands the root problem and can tell us exactly how to fix it. Thanks!
Thank you so much. This was a tremendous help and solved my problem.
Thanks a lot! This was giving me trouble for days. It made no sense, so glad you brough back some logic.
Thank you, helped me out big time.
Hats off. It’s worked. Thank you verymuch.